How to add a view counter to your NextJS site using Vercel KV
Vercel KV recently got released, and is easy to set up, integrate, and has a reasonable free tier, making it a good choice for small sites.
Setting up
# install the KV package
npm i @vercel/kv

# install the Vercel CLI
npm i -g vercel@latest
Create the KV database and connect to it
Steps below taken from Vercel documentation:
-
Inside your Vercel project, navigate to the Storage tab, then select the Connect Database button.
-
Under the Create New tab, select KV and then the Continue button.
-
Enter relevant information in the dialog, and then click Connect.
-
Pull the environment variables into your local project by running
vercel env pull .env.development.local.
Creating the API route
We can now create the API route that increments the view counter on each page load.
import { kv } from "@vercel/kv"
import { NextRequest, NextResponse } from "next/server"

export async function POST(req: NextRequest): Promise<NextResponse> {
  const body = await req.json()
  let slug: string | undefined = undefined
  if ("slug" in body) {
    slug = body.slug
  }
  if (!slug) {
    return new NextResponse("Slug not found", { status: 400 })
  }

  await kv.hincrby("pageviews", slug, 1)
  return new NextResponse(null, { status: 202 })
}
This is a POST request route handler, that takes in a JSON request, and increments the 'pageviews' for the correct 'slug'.
Creating the Pageview component
We now need a component that calls the API above, which we can then use on whatever page we want our counter to track.
"use client"

import { usePathname } from "next/navigation"
import { useEffect } from "react"

export default function IncrementView() {
  // get the current slug
  const slug = usePathname()

  // call the API we created earlier
  useEffect(() => {
    fetch("/api/increment", {
      method: "POST",
      headers: {
        "Content-Type": "application/json",
      },
      body: JSON.stringify({ slug }),
    })
  }, [slug])

  return null
}
We can then import this component into any route we want tracked. We can track
all routes by importing into the root layout.tsx file.
Vercel CLI
We can now check if things are working by calling this API a few times and then checking the KV CLI tool.
Back in your Vercel dashboard, click on Storage and select the Store that has just been created.

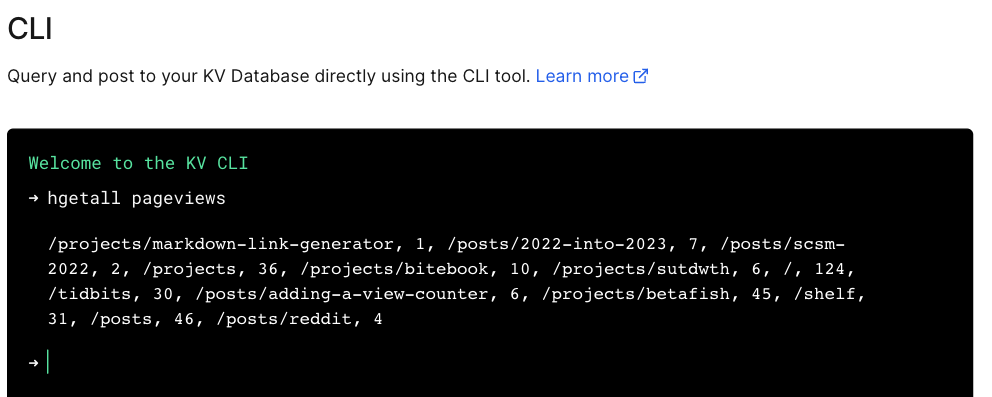
Run the command hgetall pageviews to query for the key pageviews.
You should see a list of your slugs. / represents the home/index page,
/posts will be the /posts page, etc.

Querying the Store
Now we need a way to display views on the frontend. There's many ways to do this, but I opted for a SSR using React Server Components.
We can create a helper function that queries the store and pass in the slug we want.
export async function getViews(slug: string) {
  const data = await fetch(`${process.env.KV_REST_API_URL}`, {
    headers: {
      Authorization: `Bearer ${process.env.KV_REST_API_TOKEN}`,
    },
    body: `["hget", "pageviews", "${slug}"]`,
    method: "POST",
    next: { revalidate: 3600 },
  }).then((response) => response.json())

  const views = await data.result

  return views
}
The slug is passed as parameters to this function which then uses the environment variables to query to KV store.
We can then use this function wherever we want to render a View Count. For instance, if you had a list of posts and want to show a View Count for each post, you can do something like this.
import { getViews } from "@/utility/helpers"

async function PostCard(post: Post | Project) {
  const views = await getViews(post.slug)
  return (
    <div key={post._id}>
      <a href={`${post.slug}`} as={post.slug}>
        {views}
          <div>
            <div>
              {post.title}
            </div>
          </div>
          <div>{post.description}</div>
        </div>
      </Link>
    </div>
  )
}
Conclusion + Links
Ok that's that. Now you have even more proof that nobody reads what you write. 🥲